
Nmap is among the most useful tools for network administrators to diagnose network problems, security auditing and even offensive security, often called the “Swiss Army knife” for sysadmins and hackers Nmap constituted a revolutionary tool which until today leads the market. Nmap works by analyzing packet responses contrasting them to rules and standards of protocols.

While it is easy to use for users who know the theory behind networking some users find difficult or don’t like to interact with the terminal or console, this tutorial explains how to install and use Zenmap, the Nmap graphical interface, a friendly interface for users unfamiliarized with terminals or even MS-Windows users, additionally when using Zenmap it will display the commands used, so using Zenmap would be a good introductory way to learn to use it through the console.
Installing Zenmap on Debian and Ubuntu
To install through apt just run:
apt install zenmap -y
Packages for other Linux distributions
RedHat based distribution users can install Zenmap following the instructions described on Nmap official website, other distribution users, and Windows and MacOS users, can also download packages or sources to compile Zenmap from the following link:
Using Zenmap
You can launch Zenmap both from your desktop environment main menu, or from the console as shown in the images below.

To launch Zenmap from the console just run:
zenmap
When launching Zenmap, or Nmap, as an unprivileged user you’ll be limited to execute scans requiring raw packets. Raw packets are sent through a lower level packet restricted for non-root users.
Also when launching Zenmap from the graphical interface you’ll find the option to run it as root as shown two images above.
Zenmap interface is very intuitive, these are the options of the top menu:
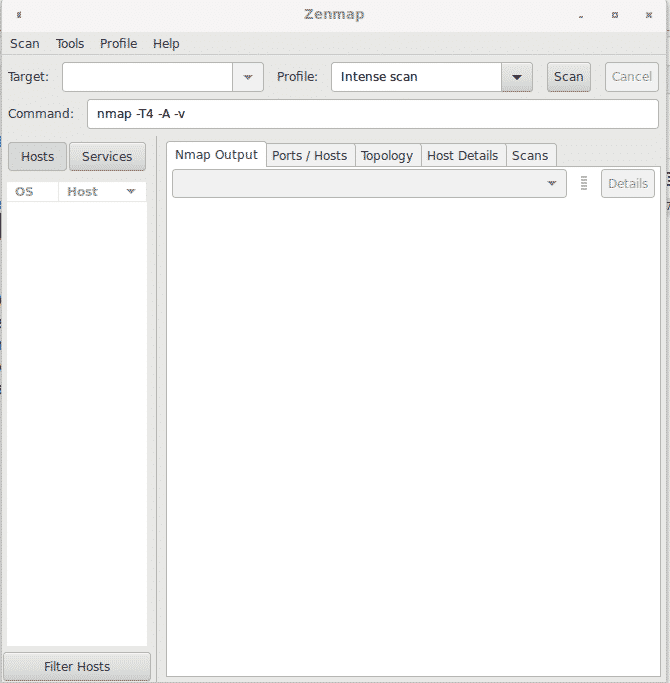
Scan: from this menu you can save and open scan results.
Tools: this menu allows to compare scan results, search among results and filter hosts.
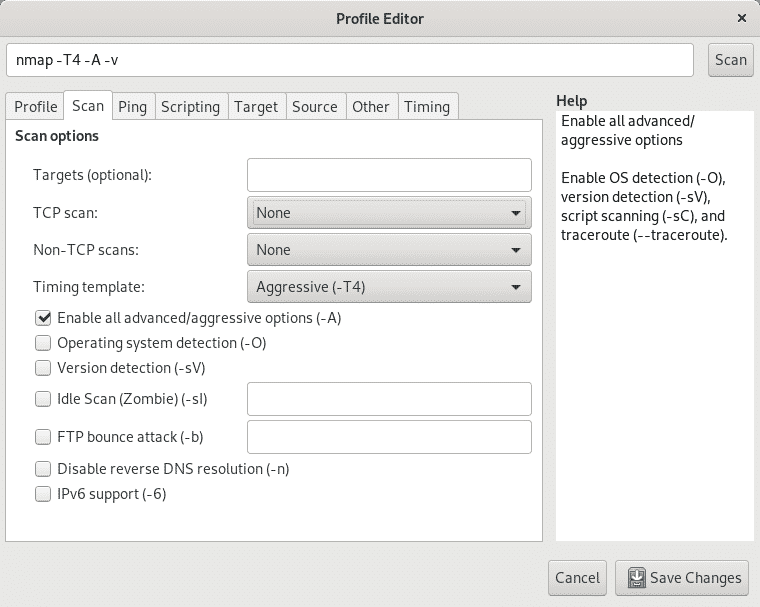
Profile: this menu allows to create and edit profiles with predefined options, here you can define the type of Scan on the second TAB after the Profile submenu tab to choose between TCP,SYN, ACK FIN, idle scan, OS detection and others.
Next to the Scan tab submenu you can find the Ping submenu to enable or disable different discovery methods or probes.

Next to the Ping tab, on the Scripting submenu tab you can access the NSE (Nmap Scripting Engine) to add plugins to your scan such as vulnerability scan, bruteforce, traceroute additional features and more.

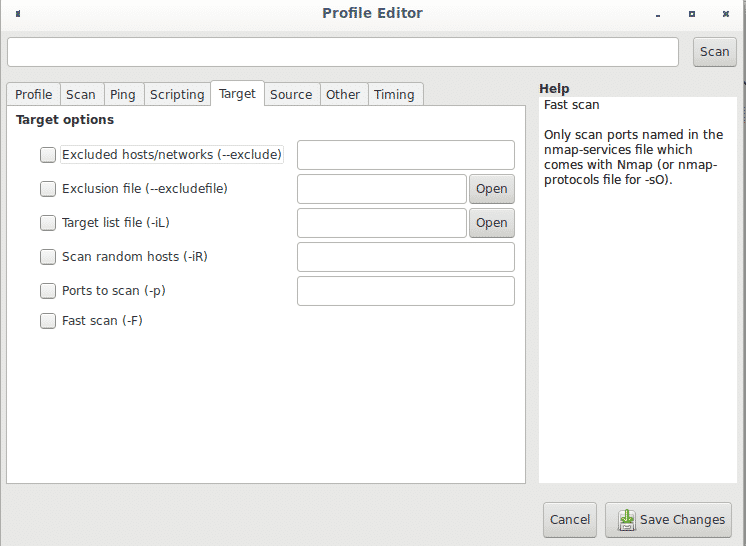
Within the Profile menu, next to the Scripting submenu you can find the Target tab which allows to define targets in a variety of ways.
The tab Source allows you to hide your IP address for example by forging a fake address (spoofing), or a specific source port considering some iptables rules may restrict or allow traffic from specific ports, here you can also set the Ethernet device.

The tab Other has additional options such as packet fragmentation, traceroute, verbosity, debugging and additional options shown in the image below.

Finally, the tab Timing will allow you to limit the scan time, probes timing, simultaneous scans, delays and additional options related to timing.

Going back to the main screen, on the first field Target you can define target/s by IP address, IP range, whole octet, etc. just like when defining targets through console. The image below shows a regular Connect or TCP scan without options against the port range 192.168.0.1 and 192.168.0.10. The scan is Connect and not SYN because Zenmap wasn’t launched as root. If you run Zenmap or Nmap as root scans are SYN by default.

Next to the Scan field you can find a drop down menu called Profile showing different scan options including, intense scan, regular scan, ping and more, also your profiles if you created customized scans.

The field Command is among the most important ones to who wants to learn how Nmap works, it shows the commands used by Nmap you are executing through the GUI interface as if you were typing on the console. Actually you can input the commands there without interacting with the console buttons and Zenmap will work as if it was Nmap from terminal.

As shown above the tab Nmap Output shows results, the next tab Ports/Hosts focuses on scanned targets ports as shown below.
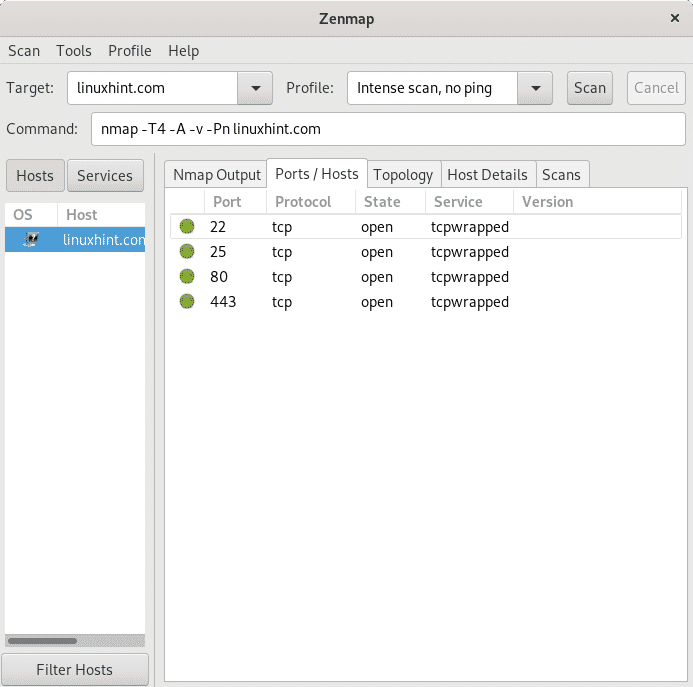
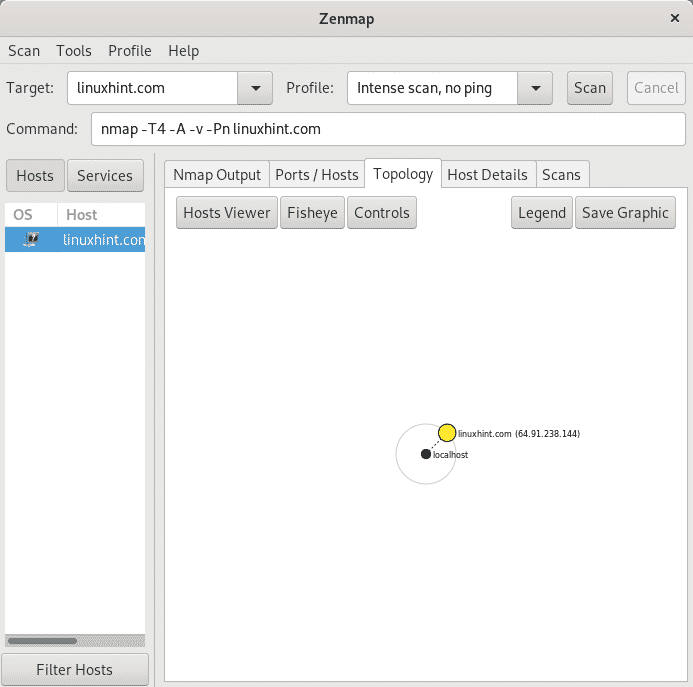
The Tab Topology gives information on the network structure, in this case the scan was launched against an internet website, LinuxHint.com.
The tab Host Details gives a resume on the scan results.

Finally the tab Scans shows the commands executed for each scan.

Conclusion:
Since documentation on Nmap prevails over Zenmap, Nmap from terminal keeps wide advantage over its GUI interface. Despite this Zenmap would be the first option for Windows users, or new Linux users. The last described field “Command” turns Zenmap into a good learning interface too, you can use the graphic interface while knowing what commands are you executing to carry out the scan.
When browsing the Profile menu tabs, you can also access a list of available scripts (NSE, Nmap Scripting Engine) with a brief description of each. Zenmap would be a good solution for home users, yet sysadmins without access to desktop environments on servers or when accessing through SSH would find it useless. When using Zenmap remember to launch it as root and not as the user associated to the desktop environment you are using it through.
Comentarios